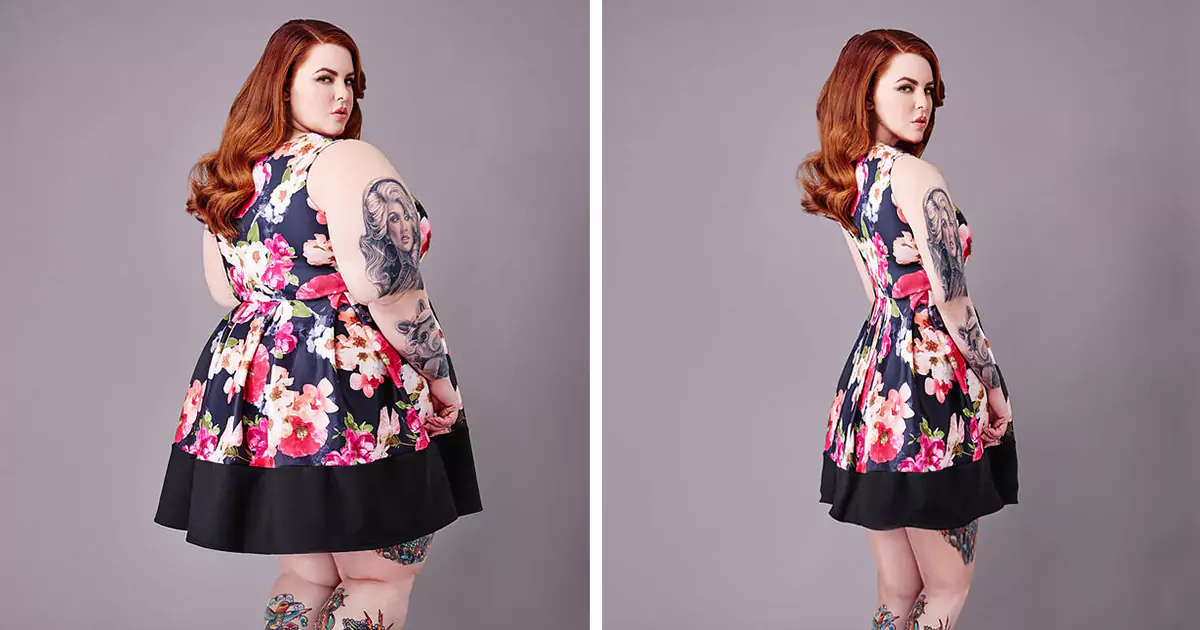
Are you looking to make a few retouches to a photo? Do you want your friend or family member to look their best in the photo? If so, this blog post is for you! We’ll show you How to make someone look thinner in photoshop without making it look unnatural.
Understand the Basics of Photoshop
Photoshop is a powerful graphic editing software that can be used to make a variety of modifications to an image, including making someone look thinner. Making someone look thinner in Photoshop requires the use of the Liquify filter, which is available in Photoshop CS6 and later versions.
Using this filter, you can push, pull, rotate, reflect and bloat any area of an image to create subtle or dramatic changes. Before starting the process though, it is important to understand the basics of Photoshop so that you know how to use the various tools properly.
Start by opening your desired image in Photoshop and then zoom into 100% or higher if working with a lower resolution image. This will make it easier for Photoshop to identify edges when using the Liquify tool. Now click on Filter > Liquify or press Shift+Ctrl+X to bring up the Liquify Tool Options window. Set the size of your brush according to how much area you want distorted and then start adjusting areas on your subject’s body where you want them slimmed down.
The Warp tool lets you pull parts inward while Pucker allows you forward push parts outward making them look smaller than they really are – both are great tools for slimming down body shapes! You can also adjust other areas such as arms, legs and neck with Bloat or Pinch tools if needed until your desired result is achieved. When finished, hit OK and save your image as a .psd file if needed
Cropping to Make Someone Look Thinner
Do you want to make someone look thinner in Adobe Photoshop? Cropping is an easy way to do it. Simply open the image of the person you want to slim down in Photoshop and select the Crop Tool. Then drag the corners of the crop tool until only the desired area of the photo is visible. Make sure that you don’t crop too much, otherwise, some of your subject will be lost. To finish, press Enter and save your edited photo! With just a few clicks, you can make someone look slimmer with cropping in Photoshop.

Adjusting Skin Tones and Lighting
Making someone look thinner in Photoshop can be done easily with the help of a few tools. The first step is to reshape the head slightly, so that the face looks a little slimmer. Using Retouch Me apps and Adobe Photoshop Liquify are great options for this purpose. To give your photos an extra boost, you can also adjust skin tones and lighting to create a more uniform look.
When it comes to adjusting skin tones, desaturating any wrinkles or blemishes will help make them less visible. You can do this by going to Image > Adjustments > Desaturate (Control-Shift-U). Then change the blending mode to ‘Soft Light’ or ‘Overlay’ as desired.
Mixed lighting or shade can also throw off the desired effect, so try playing around with different levels of brightness and contrast until you get the look you want. You could also use color filters such as dodge and burn or a Vibrance layer to balance out any uneven tones in your image and enhance your model’s features.
Following these steps should give you great results in no time! With just a few adjustments, you’ll have managed to make your subject look thinner and more flattering than ever before!
Using the Liquify Tool
Using the Liquify tool in Adobe Photoshop CS6 is the best way to make someone look thinner. To access this tool, go to the “Filter” drop-down menu and select “Liquify.” A new screen will open with tools on both sides. Use the Forward Warp Tool, which looks like a downward-pointing finger in the upper left corner of the toolbar, to move pixels in the direction you push with your mouse or stylus. You can also manipulate your image by using a combination of Shear and Liquify. Experiment with different settings until you find a look that suits you best, but be sure to save your original image before making any changes!
Making Gently Gradual Changes with Blur Tools
One way to make someone look thinner in Photoshop is to use blur tools. First, select the area you want to blur. Then, choose the Filter menu and select Sharpen > Unsharp Mask. This will show a Levels histogram which will give you an overview of how much of every color is present in your selection. With this information, you can adjust the settings accordingly.
Once you have the correct setting, click on the Blur Tool on Photoshop and set it to a medium size. Start brushing over areas where you want to make gradual changes and reduce sharpness of certain areas that can bring attention away from your subject’s body shape.
Once complete, use Restore All option in the right panel for best results and make sure that your brush size is slightly larger than any blemishes or imperfections on your subject’s skin. Finally, if needed, use Modify > Expand / Contract options to expand or contract selection for thicker or thinner lines respectively so that they blend into each other seamlessly!
Adding a Soft Focus or Vignette Effect
Using Photoshop, you can make someone look thinner by adding a soft focus or vignette effect. To do this, start by right-clicking or Control-clicking the layer in the Layers panel and select “Feather” to give your selection a gradual darkening effect. Then, click the Masks icon in the Properties panel and increase the Feather setting.
You can also use Retouch Me apps to edit photos and make them thinner quickly and easily. Furthermore, Adobe Photoshop Liquify lets you draw on images and easily add text and shapes as well. Lastly, you can enhance portrait shots with a soft focus filter to give skin tones a tanned look which will make someone appear thinner.
Adjusting Colors for Slimming Effects
One way to make someone look thinner in Adobe Photoshop CS6 is by adjusting colors. To do this, open the image, then click Image > Adjustments > Hue/Saturation and move the Saturation slider to the left until you get the desired effect. This will make the colors of the image more muted, giving a slimming effect. Additionally, you can adjust other color settings such as Brightness and Contrast for further slimming effects.
Another way to slim someone down in Photoshop is by using the Liquify tool. The Liquify filter can be found under Filter > Liquify and allows you to manipulate parts of an image with brushes or pins. Using this tool, it is possible to reshape facial features or bodies for a slimmer look without affecting any other parts of the image.
Using Retouch Me apps can also be a great way to make someone look thinner in photos quickly and easily. Retouch Me has powerful tools like Face Slimmer which allow users to change their face shape instantly with just one click!
Finally, adjusting contrast levels can help create an optical illusion of someone looking slimmer than they actually are. To do this in Photoshop CS6, open your image then go Image > Adjustments > Levels and drag the left slider towards right until you get your desired effect.
Applying Sharpening Filters with Care
Sharpening filters are a great way to make someone look thinner in Photoshop. However, they should be used with care as they can easily create an unnatural look. To ensure the best results, it is important to sharpen the image on a duplicate layer and set the blending mode to “Overlay” for maximum impact. Additionally, you may want to zoom in to 100% and use the Freeze Mask Tool for more precise adjustments. Once you’ve applied your sharpening filters, convert the image layer into a smart object and adjust settings like High Pass Filter and Liquify accordingly. Following these steps will help you achieve a natural-looking thinner appearance when editing photos in Photoshop.
Working with Dodge and Burn Tools
In Photoshop, there are several ways to make someone look thinner. One of the most effective techniques is using the Dodge and Burn tools. This method can be used to add depth and dimension to an image without significantly altering its overall look.
To use the Dodge and Burn tools, first select a large soft brush with low opacity. Then use the dodge tool to lighten areas that need highlights and the burn tool to darken areas that should appear shadowed or receded from view. Make sure the opacity of your brush is set low, as this will allow for more subtle adjustments and prevent any drastic changes in your image’s appearance.
Another useful tool for thinning out a subject is Image Size dialog box. With this function you can check off “Constrain Proportions” so that all changes made are proportional across height and width, rather than just one dimension being changed drastically. This ensures an even reduction of size throughout an entire person’s body.
By following these steps and combining them with other retouching techniques such as Curves or Color Balance, you can create stunning images with minimal effort while making sure your subjects appear their best!
Utilizing Layer Masks for Precision Editing
Photoshop is an incredibly powerful image editing software, and it can be used to achieve many different effects. One of the most popular effects is making someone look thinner in a photograph. This can be done using layer masks for precision editing.
To start, open the image you want to edit in Photoshop and select the layer containing the mask you want to edit. Then click on the Mask thumbnail in the Layers panel. Next, duplicate this layer by clicking ‘Duplicate Layer’ in the Layers window. Now click on Filters and then Liquify… Select the Freeze Mask Tool from here and use it to precisely adjust any areas that need thinning out or smoothing out.
Once you’re happy with your edits, you can further refine them by adding a filter layer over your edited mask layer, which will add more depth and detail to your work. To do this, click on Filters again and choose from one of Photoshop’s many filter options such as Gaussian Blur or Unsharp Mask. When you have chosen a filter effect that looks good for your image, remember to hide or show it as needed depending on if you want that effect included or not.
Using these simple steps with layer masks will help make anyone look thinner in no time! With a bit of practice and patience you’ll soon be able to create professional-looking results with ease!


