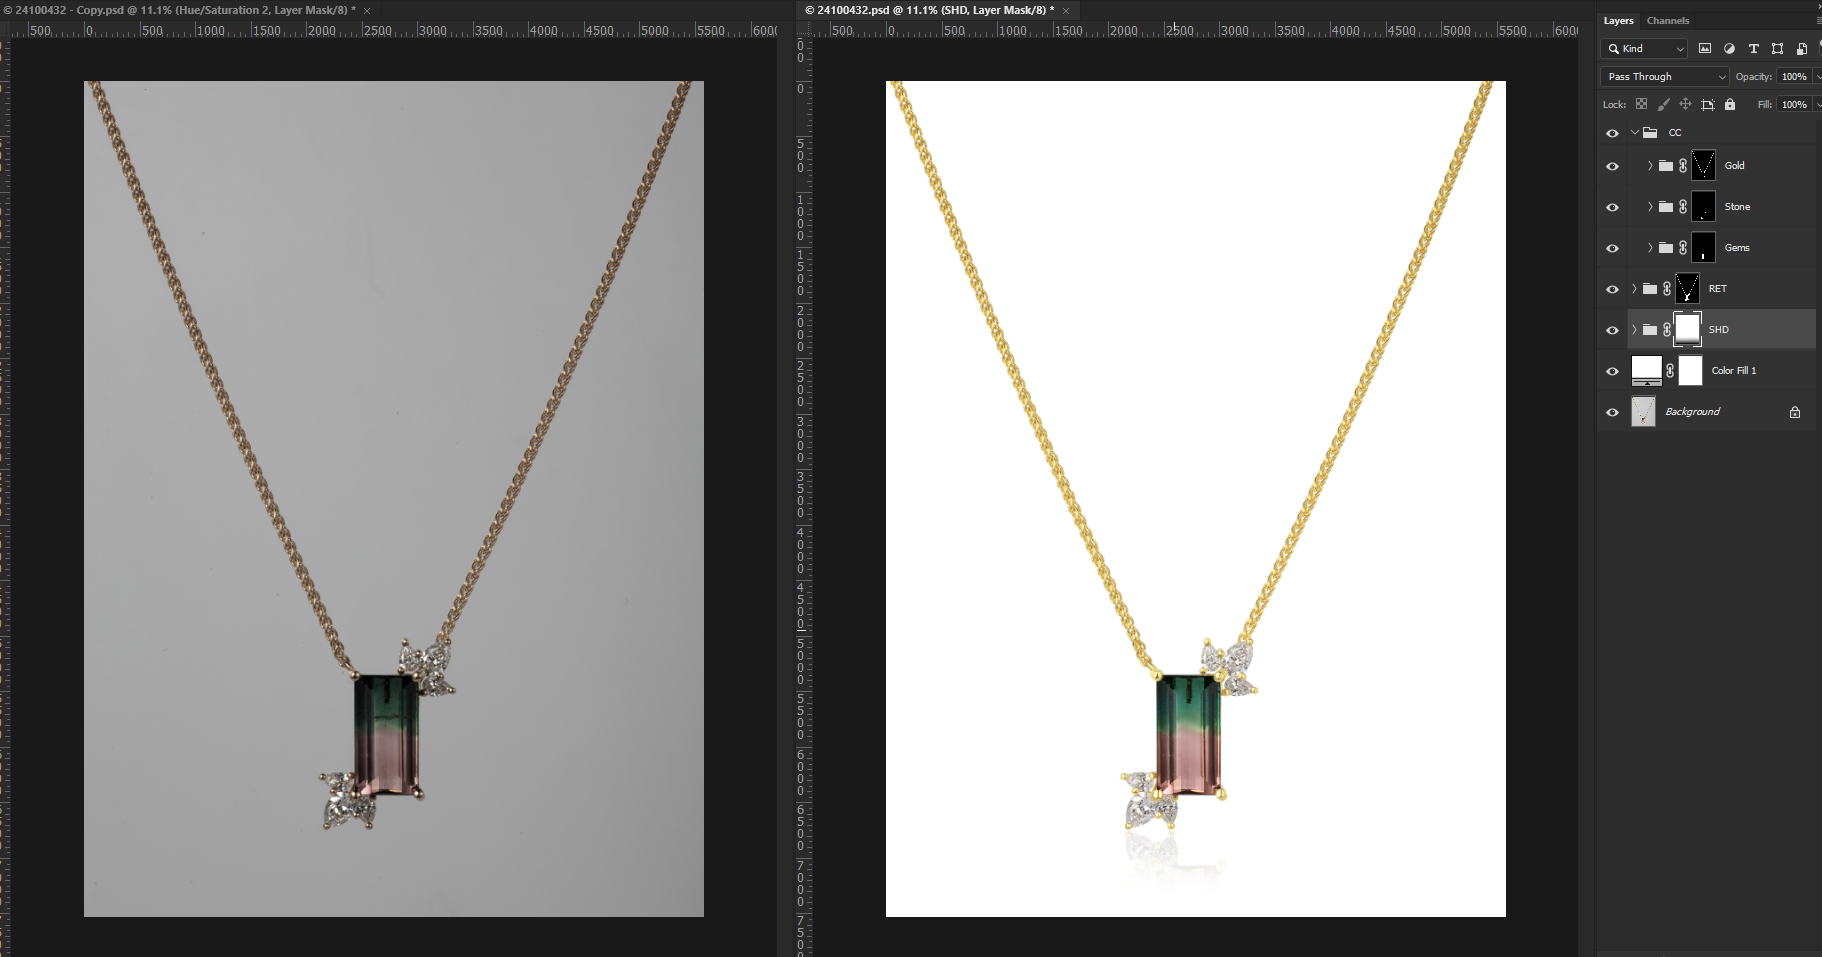
Image shadow masking is a process that is used to create a three-dimensional effect on an image. This effect is often used to add depth to an image or to make an image appear more realistic.
The process of shadow masking involves using a black mask to cover parts of an image. The masked areas are then allowed to stand out more, while the unmasked areas remain in the background.
This process can be used to create a number of different effects, including making an object appear to be in front of or behind another object, or to create a sense of depth.
Shadow masking can be used on both digital and traditional images. When used on digital images, the process is often referred to as digital masking.
There are a number of software programs that can be used to create digital masks. Some of these programs include Adobe Photoshop, GIMP, and Paint Shop Pro.

Create a digital mask
1. Open the image you want to mask in your image editing program.
2. Create a new layer.
3. Select the brush tool and set the color to black.
4. Paint over the areas you want to mask.
5. Save the image.

Create a traditional mask
1. Cut a piece of black paper or fabric to the same size as your image.
2. Place the paper or fabric over the areas you want to mask.
3. Use a pen or pencil to trace around the masked areas.
4. Cut out the masked areas.
5. Place the cutouts over the corresponding areas on your image.

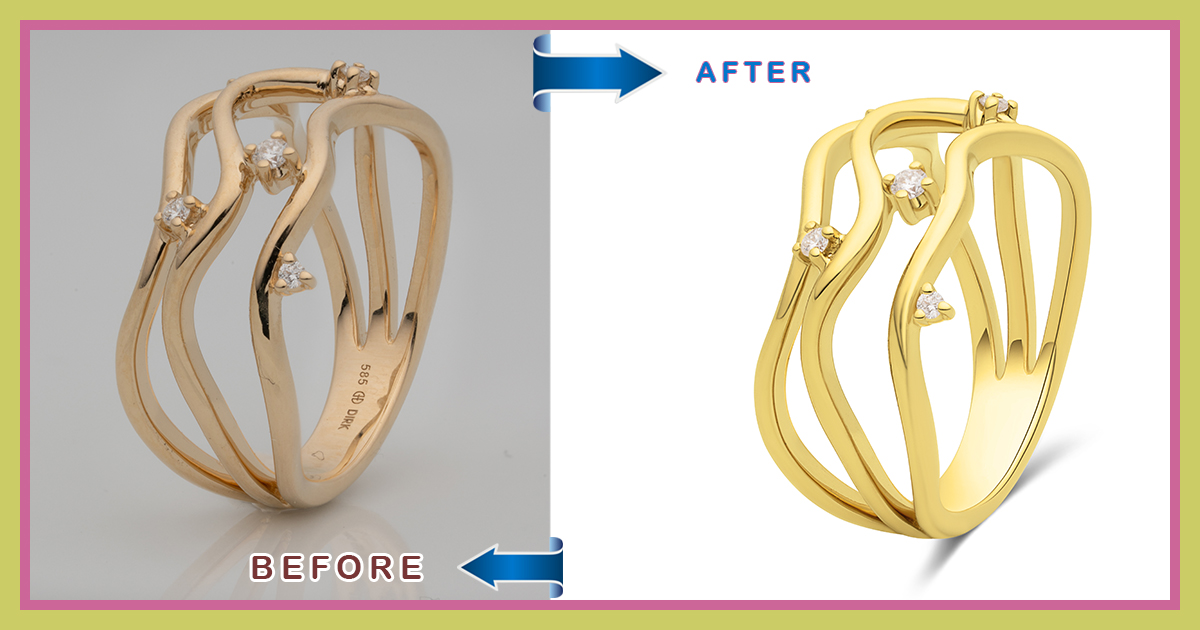
How to add drop shadows to text and images in Photoshop?
Adding a drop shadow to text or images in Photoshop is a simple way to add some depth and interest to your project. By casting a shadow below your object, you can create the illusion of it floating above the background. In this tutorial, we’ll show you how to add a drop shadow to text or images in Photoshop.
How do I add a drop shadow in Photoshop?
1. Open your image in Photoshop.
2. Select the layer you want to add a drop shadow to.
3. Click the “Layer” menu and select “Layer Style.”
4. Click the “Drop Shadow” checkbox.
5. Adjust the shadow’s opacity, distance, and spread to your liking.
6. Click “OK” to add the drop shadow.
How to create a drop shadow photo border in Photoshop?
1. Open your image in Photoshop.
2. Add a new layer above your image.
3. Choose a dark color for your foreground color and a light color for your background color.
4. Select the “Gradient Tool” from the toolbar.
5. Click and drag the gradient tool from the top of your image to the bottom.
6. Select the “Blur” tool from the toolbar.
7. Blur the gradient layer by clicking and dragging the blur tool over the gradient layer.
8. Change the layer mode of the gradient layer to “Multiply.”
9. Select the “Eraser Tool” from the toolbar.
10. Erase the bottom edge of the gradient layer to create a soft edge.
11. Save your image.

How to change the color of a drop shadow in Photoshop?
Photoshop shadow effects: an overview of drop shadows!
A drop shadow is an effect created by Photoshop that makes an object appear to be raised above the background. The shadow is created by adding a dark layer beneath the object. The object appears to be floating above the background because the shadow makes it appear to be raised.

Creating Photoshop Shadow Effect Under Object or Person
If you want to create a shadow effect under an object or person in Photoshop, you can use the “Drop Shadow” layer style. To do this, first select the layer that you want to apply the shadow to. Then, go to the “Layer” menu and select “Layer Style.” From the list of layer styles that appears, select “Drop Shadow.”
In the “Drop Shadow” settings window, you can adjust the angle, distance, spread, and size of the shadow. You can also choose whether you want the shadow to be a solid color or gradient. When you’re finished, click “OK” to apply the shadow effect.
How to create long drop shadows in Photoshop?
To create a long drop shadow in Photoshop, first, create a new layer. On the new layer, use the Rectangle Tool to draw a rectangle. Next, fill the rectangle with black. Then, go to Filter > Blur > Gaussian Blur. Use a radius of 5px and click OK. Finally, go to Edit > Transform > Skew. Use a value of -45° and click OK.
Use the Variety of Shadows
How to customize the border and shadow colors?
Best drop shadow settings in Photoshop
How to Add a Drop Shadow Photoshop?
Duplicate & extend The Long Shadow
Adjust the angle of your text or image
Correct the angle of the long shadow
Click OK to commit to changes
Change the color of the bottom layer
Adjust Drop Shadow Position
Select Layer Effects > Drop Shadow
Reposition The Long Shadow
Duplicate The Angled Layer 100 Times
Increase the width and height of the canvas
Merge Duplicated Layers
Duplicate Your Text Or Image Layer
Highlight the text or image layer
The Difference: Drop Shadow Vs. Cast Shadow
Light Origin & Tidy Up Shadows
Unlock the background layer
Refine The Look Of The Shadows
Adjusting Realistic Drop Shadow Color
Add an Alpha-channel
Summary of How to add drop shadows to text and images in Photoshop?:
Adding a drop shadow to text or images in Photoshop is a quick and easy way to add some depth and dimension to your designs. In this tutorial, we’ll show you how to add a drop shadow to text or an image using a few different methods. First, open your Photoshop project and make sure the layer you want to add the drop shadow to is selected.
Then, go to Layer > Layer Style > Drop Shadow. This will open the Drop Shadow settings dialog box. Here, you can adjust the Opacity, Angle, Distance, and Size of the shadow.
Play around with the settings until you get the look you want. Once you’re happy with the drop shadow, click “OK” to apply it to your layer. You can also add a drop shadow by going to Filter > Render > Drop Shadow.
This will open the same Drop Shadow settings dialog box. If you want to add a drop shadow to multiple layers at once, you can do so by selecting the layers in the Layers panel, then going to Layer > Layer Style > Drop Shadow. Finally, you can also add a drop shadow using the Pen tool.
First, draw a path around the object you want to add the shadow to. Then, go to Layer > Layer Style > Drop Shadow and click “OK”. Now that you know how to add a drop shadow in Photoshop, experiment with different settings to create different looks.