Photography is the magic that turns something real into a captivating visual. And in jewelry photography, it’s like giving the gems their moment to shine. Since the rise of e-commerce, jewelry photography has gone from nice-to-have to must-have.
From online stores to Instagram feeds, great jewelry photos spark interest, and even make people say, “Take my money!” So, whether you’re selling jewelry, showcasing collections, or want to try your skill at capturing brings through a camera, you need to learn the A to Z of jewelry photography.
And, if you want your jewelry to look irresistible, this guide’s for you. We’ll walk through everything from lighting, angles, gear, and even phone photography. By the end, you’ll be filled with all types of jewelry photography ideas and snapping pics like a pro.
Ready to turn your jewelry into art? Let’s dive in!
Why Jewelry Photography Is Essential
Surveys show that more than a quarter of online shoppers rely on product photography to make their purchasing decisions. Since jewelry is one of the trendiest and highest-selling accessories in the world, how it is presented in the photos matters most in branding success.
This ultimately makes good jewelry photography valuable. Besides, in the world of eCommerce and social media, images are the first impression your jewelry will make on a potential buyer or follower. They also influence brand or retail promotion and advertisement.
So, from gemstones to metalwork, a beautiful photo showcases the intricate details of your jewelry. Moreover, good photography can elevate the perceived value of your items and drive more interest.
Equipment You Need For Jewelry Photography
Jewelry photography requires precision from every possible angle. From background and light to setup position, it requires several necessary equipment to bring out a perfect shot. But what are the most essential equipment you will need for jewelry product photography?
Here is a list of equipment you must have when preparing for photography.
- Cameras
If you want your jewelry photos to capture all the necessary and the tiniest details, you must ensure to have a good-quality camera. If you already have a DSLR or mirrorless camera, you can start with that.
However, if you don’t have one but are ready to purchase the best camera for jewelry photography, you will find plenty of options. Some of the most popular cameras are Panasonic LUMIX S5, Canon EOS R6, Sony Alpha A7R III, etc.
- Lenses
To make the photography more creative and capture good details, you will need good-quality lenses. Standard lenses are fine for general shots, but macro lenses are indispensable for close-ups.
Don’t know what to get? Don’t worry. Just like the cameras, there is a wider range of lenses available. The best lens for jewelry photography include Nikon 50mm F/2.8, Sony FE 90mm f/2.8 Macro G OSS, Nikon AF-S DX Micro-NIKKOR 40mm f/2.8G, Canon EF 100mm f/2.8 Macro, etc.
- Tripod
Whether or not you are a professional photographer, it is vital to invest in a top-notch quality tripod. It helps you capture more steady images. Look for tripods made of aluminum or carbon fiber as they are more sturdy and durable.
- Background
Though many rookie photographers underestimate it, a clean and perfect background can be the game changer. You can create various types of backgrounds for the photo and set it up. We will discuss more about it in the next section.
- Lights
Lighting is perhaps the most crucial element in jewelry photography. While natural light can work well, it’s often inconsistent and can create harsh shadows.
Even if you are using natural light sources (for outdoor shots), you must pick a well-lit location. For indoor shooting, make sure the studio has enough bright lighting sources.
You can also use reflectors and diffusers. Reflectors bounce light back onto the jewelry, while diffusers help soften and spread the light to prevent harsh highlights.
- Lightbox/Light Tent
Lightbox jewelry photography has become one of the most popular jewelry photography equipment these days. It ensures the jewelry appears vibrant and minimizes reflections.
- Table (Optional)
Though it’s not essential, having a standard foldable table can often come in handy.
- Props (Optional)
Rather than sticking to usual “jewelry only” photographs, you can try adding various other elements or props in the photo. You can use things like mirrors, flowers or leaves, ring holders or boxes, makeup items, etc., according to your vision or creativity.
Setting Up The Perfect Background
Setting up the background can be simple, yet a wrong move can change everything. So here are some tips for setting up the best background for jewelry photography.
Types Of Backgrounds
There are several types of jewelry backgrounds you can choose from. Such as,
- White background,
- Black or dark background,
- Gradient background,
- Neutral background,
- Textured background,
- Mannequin bust,
- Bokeh, etc.
Best Practices For Choosing Backgrounds
When it comes to choosing a background for jewelry photography, simplicity is the best way. You won’t want the background color to overpower the jewelry and make it appear dull.
If your jewelry is intricate, opt for a simple background to avoid competition. For colorful or statement pieces, a neutral background works best.
DIY Background Ideas
If you’re on a budget, you can easily create custom backgrounds using materials you have around the house. For example, a piece of fabric, a wooden table, or a marble countertop can all make great, inexpensive backgrounds.
Understanding Lighting For Jewelry Photography
Good jewelry photography lighting is essential for capturing the brilliance and detail. And, here’s what you need to know:
Natural Vs. Artificial Lighting
If you can use natural light properly, it can create soft, flattering photos. However, it’s not always very reliable, especially when it comes to consistency.
On the other hand, artificial lighting, like studio lights, is more controllable. It can be set up in a way that provides uniform lighting across all your shots.
Lighting Setup
A lightbox is an excellent option for beginners to ensure a soft, diffused light. It also creates a consistent lighting environment.
However, if you don’t have a lightbox, softboxes can provide similar results. Positioning your light at a 45-degree angle to the jewelry helps reduce shadows and highlight its features.
Choosing The Right Camera Settings
To capture jewelry in the best light, you need to master a few key camera settings:
Aperture
What is the best aperture for jewelry photography? Well, that depends!
A small aperture (high f-stop number, like f/11 to f/16) ensures more of the jewelry is in focus. This is especially important for close-up shots of intricate pieces.
On the other hand, a shallow depth of field (wide aperture like f/2.8) can help isolate the jewelry from the background if you want to create a more dramatic effect.
ISO Settings
Keep the ISO as low as possible to avoid noise in your images. Typically, setting the ISO to around 100 or 200 is ideal for jewelry photography.
Shutter Speed
In most cases, a shutter speed of 1/100 to 1/200 seconds is good for jewelry. This can help capture intricate details of the piece. If you’re using a tripod, you can go slower if you want to avoid risking blur.
White Balance
To ensure the colors in your jewelry are accurate, it is best to set your camera’s white balance manually. However, many photographers use the AUTO options as high-quality cameras make the adjustment automatically depending on the lights.
Camera Angles And Composition Tips
The way you angle your camera can dramatically change the look of your jewelry. So, to capture the best shot from the best angle, you can try the following tips:
- Choosing The Right Camera Angle
For rings, shooting from the side to capture the profile can highlight the complexity of the designs. For necklaces or bracelets, a top-down shot may work best to showcase the entire piece.
- Macro Jewelry Photography
The right jewelry photography setup with a macro camera captures the fine details of gemstones, texture, and craftsmanship. Just zoom in and capture every fine detail with clarity.
- Flat Lay Photography
A flat lay or top-down shot is perfect for showing off necklaces, earrings, or a collection of jewelry pieces. Make sure the pieces are arranged neatly and consider using props or texture to add interest to the shot.
- Highlighting Texture And Shine
To capture shines or sparkles, consider using a soft light source. It will highlight the texture and glossiness of metals and gemstones without overwhelming the shot with glare.
Advanced Photography Techniques
Once you’ve mastered the basics, you can explore more advanced techniques:
- 360 Degree Jewelry Photography
A 360-degree shot is very popular these days. It offers a dynamic view of your jewelry. This technique involves photographing the piece from multiple angles and stitching them together for an interactive display.
Tip: A rotating jewelry stand can make this process easier.
- Focus Stacking
Focus stacking involves taking multiple shots of the same piece of jewelry, each with a slightly different focal point. And then combining them to create a perfectly sharp image from front to back.
Jewelry Photography Tips And Tricks
Take your jewelry photography to the next level with the following tips and tricks!
- Preventing Reflections
Reflections can distract from the beauty of your jewelry. Use a polarizer filter or adjust the angle of your lighting to minimize reflections on shiny surfaces.
- Handling Small Jewelry Pieces
Small items like rings, earrings, and pendants can be tricky to shoot. Use a macro lens to get close without distortion, and always shoot with a tripod to maintain sharpness.
- Using Props Effectively
Props can add a touch of elegance or uniqueness to your photos. But be careful not to let them overpower the jewelry. Simple items like a small dish, fabric, or a flower can work well as subtle props.
- Edit The Photos
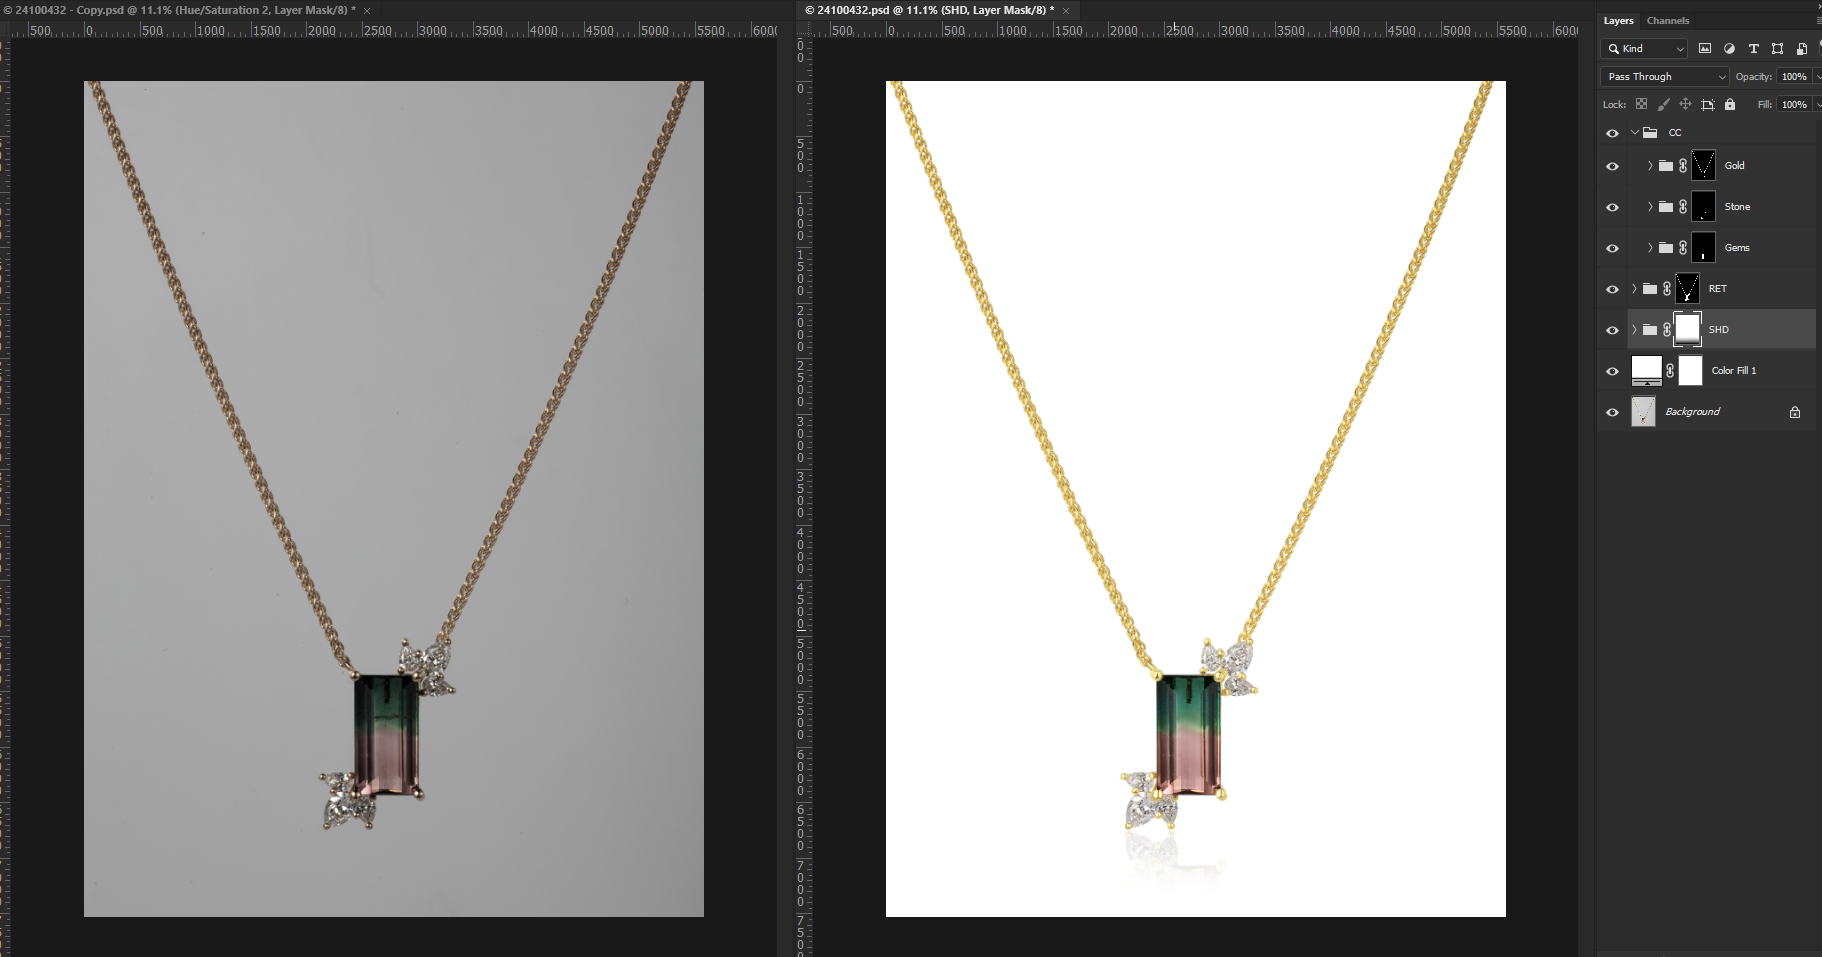
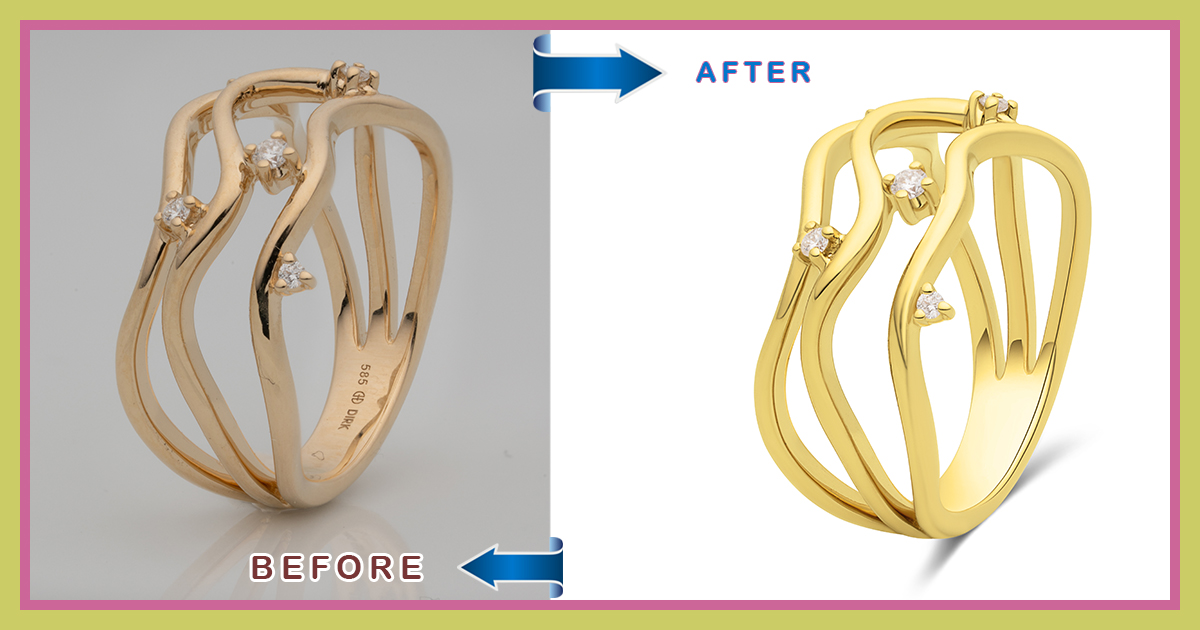
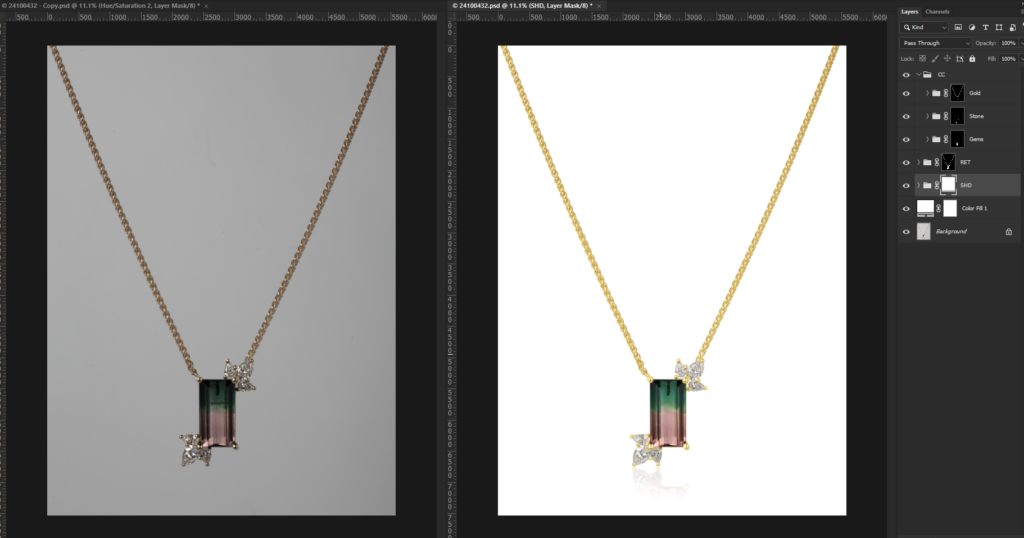
The camera can fail to capture the natural color or the glow of the jewelry or capture unnecessary things. But you can always fix it using photo editing apps. If you are not up for it, you can always hire a professional retouching service like First ClippingPath.
Common Mistakes to Avoid in Jewelry Photography
If you are a beginner, it is easy to make mistakes. But you must want to avoid these mistakes:
- Ignoring Proper Lighting: Avoid harsh direct light and overly dark settings.
- Using Cluttered Backgrounds: Stick to simple, neutral backdrops that make the jewelry pop.
- Forgetting To Clean the Jewelry: Always clean jewelry before shooting to keep it looking glorious.
- Overlooking Focus And Sharpness: Use a tripod and set the camera for a sharp focus to capture every sparkle.
- Overdoing Post-Processing: Aim for natural, true-to-life colors to maintain a professional look as overdoing it makes it look fake.
Jewelry Photography with a Mobile Camera: Pocket Power!
Today’s smartphones pack some serious camera tech that’s perfect for jewelry shots. The iPhone 15 Pro Max is a top pick for its sharp detail and vibrant colors, perfect for making gems sparkle.
Also, the Google Pixel 8 Pro shines with its AI-powered sharpness. And the Samsung Galaxy S24 Ultra is known as the best camera phone for jewelry photography because of its superb camera quality and settings.
To make things more convenient, you can use various mobile apps to edit and retouch the images. In our observation, the best camera app for jewelry photography is PicsArts. It is popular and a lifesaver for adjusting brightness, colors, and shadows like a pro.
Lightroom Mobile has easy filters for giving your photos a polished, clean look. And Snapseed? It’s like having a mini photo studio in your pocket for spot-fixing and fine-tuning.
Final Sparkle: Snap Like a Pro!
Jewelry photography might seem daunting, but with the right tools, tricks, and a little creativity, you’ll be capturing pro-level shots in no time! However, mastering jewelry photography may take time.
Remember, lighting is your best friend, while backgrounds should let your gems shine. And even a phone can do wonders if used right. So, whether you’re snapping for sales, social media, or your own collection, the tips from this article will help your jewelry steal the spotlight.
