Post-production image editing refers to the process of enhancing, retouching, and manipulating images in order to improve their quality and appearance. It involves adjustments in color, contrast, sharpness, and other elements to achieve the desired outcome.

Additionally, post-production image editing can also involve removing unwanted elements, adding special effects, or creating composite images. This process is vital in various industries such as photography, advertising, e-commerce, and graphic design. By utilizing specialized software and techniques, post-production image editing allows for the creation of visually appealing and compelling images that meet the specific requirements of clients or projects.
Understanding The Basics Of Post Production Image Editing

Post production image editing, also known as photo editing, is a crucial step in the process of enhancing and optimizing your images. By making adjustments and improvements to the raw or captured images, you can elevate the visual impact and overall quality of your photographs.
Whether you’re a professional photographer or an enthusiast, understanding the basics of post production image editing is essential to create stunning visuals that truly capture your vision.
The Importance of Production Image Editing

Post production image editing serves several important purposes that can significantly enhance the quality and impact of your images. Here are some key points to consider:
- Enhancing image aesthetics: Post production editing allows you to fine-tune various aspects of your images, such as exposure, color vibrancy, contrast, and sharpness. By adjusting these elements, you can create visually stunning images that grab the viewer’s attention.
- Correcting imperfections: Not every photo comes out perfect straight from the camera. Post production editing provides you with the tools to fix imperfections like underexposed or overexposed areas, lens distortions, noise, blemishes, and other unwanted elements. These corrections ensure that your final images are polished and visually appealing.
- Expressing your artistic vision: Post production image editing allows you to add your personal touch and creativity to your photographs. Through adjustments and creative effects, you can enhance the mood, add depth, or create a specific atmosphere that reflects your unique artistic style.
- Highlighting important details: With post production editing, you can selectively enhance or diminish specific elements within the image. This enables you to emphasize important details that might have been overlooked or to minimize distractions, directing the viewer’s focus to the intended subject.
- Maintaining consistency: For photographers who work on a series of images or have a specific style, post production editing ensures consistency across their work. By applying similar adjustments and adjustments to a collection of images, photographers can establish a cohesive visual aesthetic that defines their brand or artistic portfolio.
Common Mistakes To Avoid In Post Production Image Editing
While post production image editing offers countless possibilities for enhancing your images, it’s crucial to avoid common mistakes that can negatively impact their quality. Here are some key mistakes to steer clear of:
- Over-editing: It’s easy to go overboard with image editing, resulting in unrealistic and unnatural-looking images. Avoid excessive adjustments, such as oversaturating colors, over-sharpening, or extreme alterations to the image’s overall tone.
- Neglecting exposure and white balance: Proper exposure and correct white balance are essential for capturing accurate colors and tones in your images. Failing to address these aspects during post production can result in inaccuracies and a loss of image quality.
- Ignoring composition and subject placement: Even with post production editing, it’s crucial to consider composition and subject placement during the initial capture. Correcting major compositional flaws in post production can be challenging and might result in loss of image quality.
- Forgetting to save original files: Always preserve the original files before starting any post production editing. This ensures that you have a reference point to revert to if needed and prevents permanent loss of data.
Selecting The Right Software For Post Production Image Editing
Choosing the right software for post production image editing is essential to optimize your workflow and achieve the desired editing results. Consider the following factors when selecting your editing software:
- Feature set: Look for software that offers a comprehensive range of editing tools and capabilities suited to your specific needs. This can include basic adjustments like exposure and color correction, as well as advanced features like layers, masks, and filters.
- User-friendly interface: Opt for software with an intuitive and user-friendly interface. This ensures a smooth and efficient editing process, allowing you to focus on the creative aspects rather than navigating complex menus and tools.
- Compatibility: Ensure the software you choose is compatible with your operating system and other hardware devices. Compatibility issues can hinder your editing process and limit your access to software updates and improvements.
- Budget and affordability: Consider your budget and the affordability of the software. There are both free and paid editing software options available, each with varying levels of functionality and features. Assess your needs and financial constraints before making a decision.
By understanding the basics of post production image editing, avoiding common mistakes, and selecting the right software, you can take your photography to the next level. Embrace the creative possibilities that post production editing offers and unlock the full potential of your images.
Essential Techniques for Production Image Editing
Post Production Image Editing
Adjusting exposure and contrast:
- Proper exposure is crucial for a well-balanced image. Adjusting exposure and contrast can greatly enhance the overall look and feel of your photos.
- Use the following techniques to achieve the desired result:
- Increase or decrease the exposure to brighten or darken the image, respectively.
- Adjust the contrast to make the image appear more dynamic.
- Use the highlights and shadows sliders to recover details in the brightest and darkest parts of the photo.
Enhancing colors and saturation:
- Adding vibrancy and saturation to colors can make your images pop and appear more visually appealing.
- Consider the following tips when enhancing colors and saturation in post-production:
- Use the vibrance and saturation sliders to boost the intensity of colors without oversaturating the image.
- Adjust the hue slider to change the overall color tone of the image.
- Target specific colors using the HSL (hue, saturation, luminance) panel for more precise adjustments.
Mastering white balance:
- Correct white balance is essential for achieving accurate colors in your photos. It helps eliminate color casts caused by different light sources.
- Follow these techniques to master white balance:
- Use the auto white balance setting as a starting point and fine-tune it manually if needed.
- Adjust the temperature slider to make the image cooler (bluer) or warmer (yellower).
- Use the tint slider to correct any green or magenta color casts.
Remember, post-production image editing is a powerful tool that allows you to bring out the best in your photos. Experiment with different techniques to find the perfect balance and make your images truly shine.
Advanced Tips For Professional-Level Post Production Image Editing
When it comes to post production image editing, there are several advanced techniques that can take your editing skills to a professional level. In this section, we will explore three key tips for advanced image editing: retouching and skin smoothing, removing unwanted objects and blemishes, and adding creative effects and filters.
Retouching And Skin Smoothing
- To achieve professional-level retouching and skin smoothing, follow these tips:
- Use the clone stamp tool to remove imperfections and blemishes on the skin.
- Utilize frequency separation technique to separate skin texture from skin tone for precise editing.
- Adjust the opacity of your retouching layers to maintain a natural look.
- Avoid over-editing by zooming in and out of the image regularly to assess the overall effect of your retouching.
Removing Unwanted Objects And Blemishes
- Removing unwanted objects and blemishes from an image can greatly enhance its visual appeal. Consider the following tips:
- Utilize the spot healing brush tool to quickly remove small blemishes, spots, or dust particles from the image.
- Use the content-aware fill tool to intelligently remove larger objects or distractions from the background.
- Take advantage of the clone stamp tool to carefully remove unwanted elements without leaving any visible traces.
- Pay attention to details and ensure that the surrounding area blends seamlessly with the edited part.
Adding Creative Effects And Filters
- Creative effects and filters can transform a dull image into a work of art. Here are some tips to enhance your images with these effects:
- Experiment with different adjustment layers, such as curves, levels, and color balance, to achieve the desired look.
- Apply creative filters or overlays to add texture, depth, or a vintage feel to your images.
- Don’t be afraid to play with blending modes and layer opacity to create unique effects.
- Use masks to apply effects selectively to specific areas of the image, enhancing the overall composition.
Remember, these are just a few advanced tips to take your post production image editing skills to the next level. Practice, experiment, and develop your own style to create stunning visuals that stand out from the crowd.
Optimizing Workflow For Efficient Post Production Image Editing
As post production becomes an essential part of the photography process, optimizing workflow for efficient image editing is crucial. By organizing and managing your image files, creating and applying presets for batch editing, and utilizing keyboard shortcuts and hotkeys, you can streamline your post production workflow and save valuable time.
Let’s explore each of these techniques in detail:
Organizing And Managing Your Image Files:
- Create a consistent file and folder naming system to easily locate and access your images.
- Use metadata tags to categorize and label your files based on important details such as location, subject, and date.
- Utilize file management software or applications to help streamline the organization process.
- Regularly back up your files to prevent loss of valuable work.
Creating And Applying Presets For Batch Editing:
- Develop a collection of presets for common editing tasks such as color correction, exposure adjustments, and sharpening.
- Apply these presets to multiple images simultaneously, saving you valuable time and effort.
- Customize presets based on specific shooting conditions or preferences.
- Regularly update and refine your presets to adapt to evolving editing styles and techniques.
Utilizing Keyboard Shortcuts And Hotkeys:
- Familiarize yourself with commonly used keyboard shortcuts to perform editing tasks quickly and efficiently.
- Customize keyboard shortcuts to match your preferred workflow and editing process.
- Use hotkeys for frequently used tools or commands, improving overall workflow speed.
- Regularly practice and incorporate keyboard shortcuts into your editing routine for optimal efficiency.
By implementing these techniques, you can optimize your workflow for efficient post production image editing. Organizing and managing your image files, creating and applying presets for batch editing, and utilizing keyboard shortcuts and hotkeys will not only save you time but also improve your overall editing process.
With a streamlined workflow, you can focus more on unleashing your creative vision and producing stunning final images.
Elevate Your Photography with Expert Post-Production Services
In the world of photography, capturing the perfect shot is just the beginning. To truly make your images stand out and leave a lasting impression, investing in professional post-production photography services is key. Whether you’re a seasoned photographer or just starting out, post-production can take your work to the next level
What is Post-Production Photography?
Post-production photography, also known as photo retouching or editing, involves enhancing and refining images after they have been taken. It’s a crucial step in the photography process that allows photographers to:
- Enhance Visual Appeal: Post-production can correct exposure issues, adjust colors, and sharpen details, ensuring your photos look their absolute best.
- Tell a Story: Skilled post-production work can bring out the emotions and narratives captured in your photos, making them more compelling and memorable.
- Remove Imperfections: Unwanted elements or blemishes can be seamlessly removed, leaving you with flawless, professional-looking images.
- Maintain Consistency: Post-production ensures that your photography style remains consistent across your portfolio, reinforcing your brand identity.
Why Invest in Post-Production Photography Services?
- Time Efficiency: Editing photos can be time-consuming, taking away from your shooting schedule. Outsourcing post-production allows you to focus on what you do best—capturing moments.
- Expertise: Professional editors have the skills and tools to transform your photos into works of art. They stay up-to-date with the latest trends and techniques to ensure your images are contemporary and engaging.
- Consistency: By working with a dedicated post-production team, you can maintain a consistent look and feel across your entire body of work, strengthening your brand recognition.
- Quality Assurance: Experienced editors pay attention to detail, ensuring that every aspect of your image is polished to perfection.
Post-production photography is the secret ingredient that can elevate your photography to new heights. Whether you’re a portrait, landscape, or commercial photographer, investing in expert post-production services can make a world of difference. So, why settle for ordinary when you can achieve extraordinary results with the power of post-production? Unlock the true potential of your photography today!
Expert Strategies For Post Production Image Editing In Different Genres
Landscape Photography: Enhancing Nature’s Beauty
Capturing the beauty of the natural world through landscape photography is a truly magical experience. However, it often requires some post-production editing to fully enhance the stunning scenery captured by your camera lens. Here are some expert strategies to elevate your landscape images to the next level:
- Enhance color and contrast: Adjusting the color and contrast can bring out the vividness and depth of your landscape photos. Experiment with enhancing the saturation and vibrancy to make the colors pop.
- Sharpen details: When photographing landscapes, the intricate details can sometimes get lost. Focusing on sharpening the key elements, such as rocks, trees, or clouds, can add definition and make your images more visually appealing.
- Adjust exposure: Proper exposure is crucial in landscape photography. Play around with the exposure settings to ensure the highlights are not blown out and the shadows are not too dark. This will help achieve a balanced and well-exposed image.
- Crop for composition: Composition plays a significant role in creating impactful landscape images. Use cropping tools to adjust the composition and remove any distractions that may be present at the edges of the frame. This will help draw the viewer’s attention to the main subject of the photo.
- Remove unwanted elements: Sometimes, there may be unwanted elements such as power lines or litter in your landscape photos. Utilize the cloning or healing brush tools to seamlessly remove these distractions and create a cleaner and more aesthetically pleasing image.
Portrait Photography: Perfecting Skin Tones And Facial Features
Portrait photography aims to capture the unique beauty and personality of individuals. To make portraits truly exceptional, post-production editing techniques can be used to perfect skin tones and enhance facial features. Here are some strategies to improve your portrait images:
- Retouching skin: Skin imperfections and blemishes can be easily corrected using tools like the spot healing brush or the patch tool. Smooth out rough patches, remove unwanted spots, and achieve a flawless complexion while still maintaining a natural look.
- Enhancing skin tones: Achieving natural and flattering skin tones is vital in portrait photography. Adjust the white balance and color temperature to ensure accurate and pleasing skin tones. This will bring out the natural beauty of your subjects.
- Adjusting facial features: Tools like the liquify tool can be used to subtly enhance facial features. You can make subtle adjustments to the shape of the face, eyes, nose, or lips to create a more balanced and aesthetically pleasing portrait.
- Adding depth and dimension: Utilize dodging and burning techniques to add depth and dimension to your portraits. Enhancing highlights and shadows can help create a more three-dimensional look, bringing your subjects to life.
- Applying selective editing: In portrait photography, it’s essential to focus on the subject while keeping the background subtle. Use techniques like selective editing or adjusting the depth of field to ensure the subject remains the main focus.
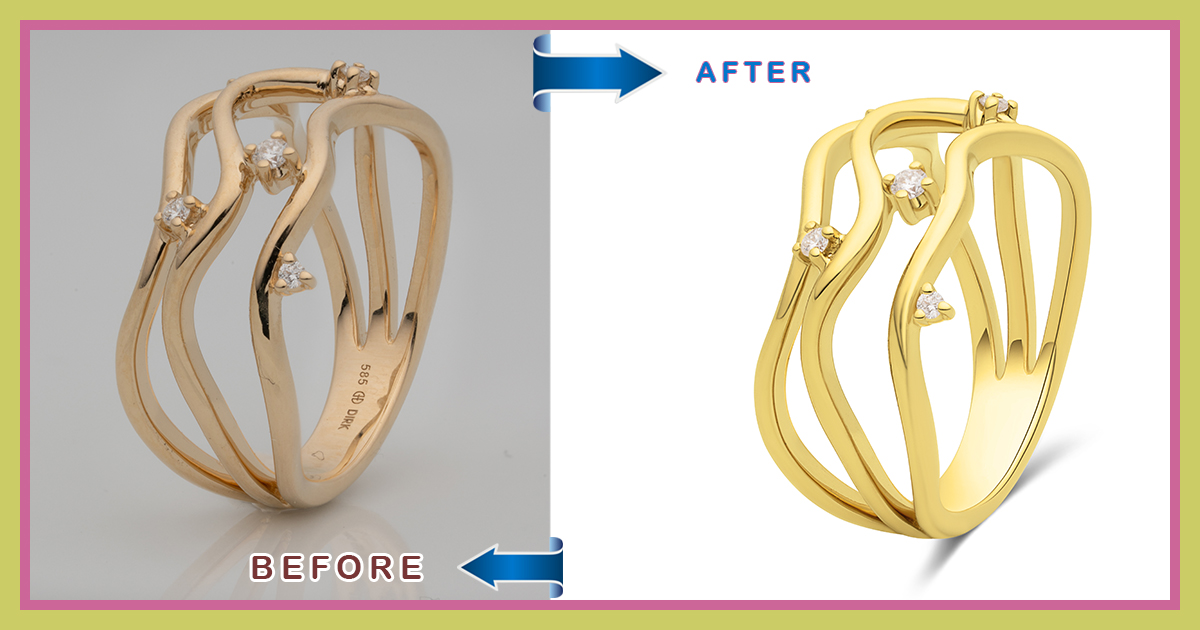
Product Photography: Creating Clean And Attractive Images
Product photography is all about presenting products in the most appealing and enticing way possible. During post-production editing, it’s crucial to create clean and attractive images that beautifully showcase the product’s features. Here are some strategies for an outstanding product photography editing:
- Consistent lighting and exposure: Ensure consistent lighting and exposure across all product images to maintain a cohesive look. This will help customers see the product accurately and have a better understanding of its details.
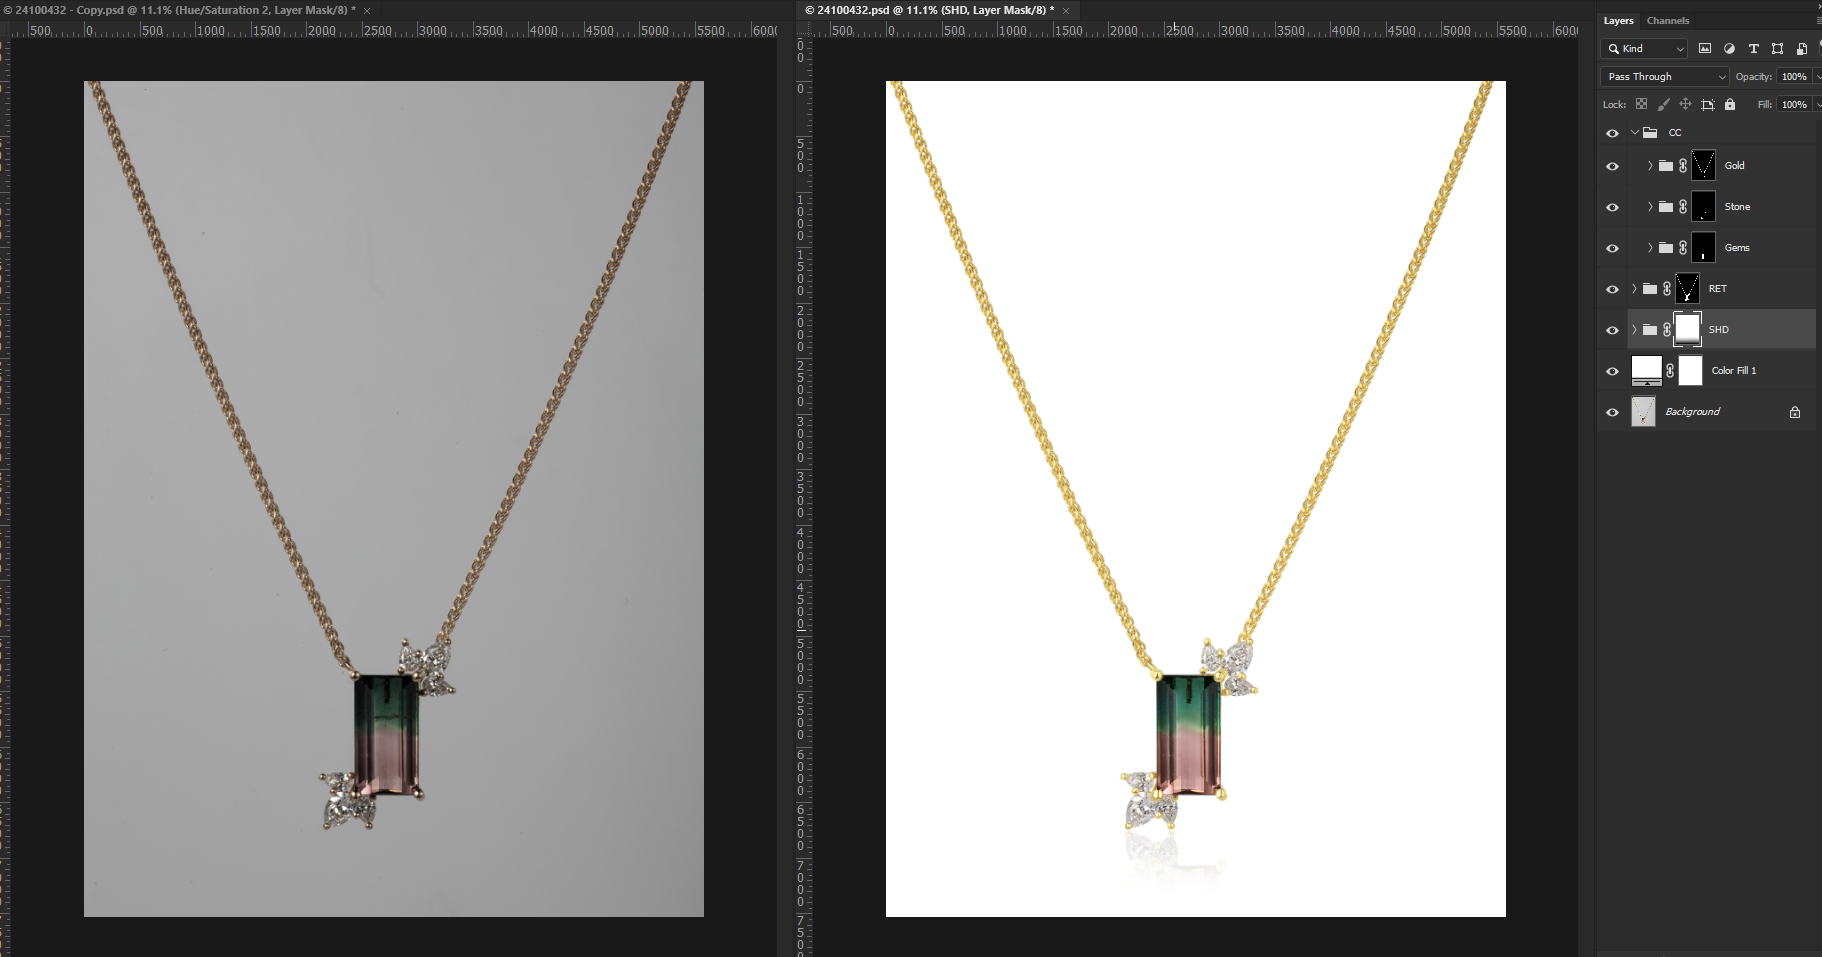
- Background removal or replacement: Clean product images often require removing the background to focus solely on the product. Use tools like the pen tool or the background eraser tool to carefully remove the background or replace it with a solid color or transparent background.
- Adjusting colors and contrast: Accurate colors are essential in product photography. Calibrate the colors to match the product’s actual appearance, and adjust the contrast to make the product stand out without losing any details.
- Removing dust or imperfections: During a product photoshoot, dust, scratches, or other imperfections may appear. Use the spot healing brush or clone stamp tool to remove these distractions and achieve a flawless and clean product image.
- Showcasing product details: Highlight the product’s unique features and textures by utilizing techniques such as sharpening and clarity adjustments. This will allow customers to have a closer look at the product details and make an informed purchasing decision.
Remember, post-production editing is an essential part of the creative process in various genres of photography. By applying these expert strategies, you can enhance the beauty of landscapes, perfect skin tones in portraits, and create clean and attractive images for product photography.
Let your creativity shine through the power of post-production editing!
Best Practices For Image post processing techniques
When it comes to post-production image editing, the process of exporting and saving edited images plays a vital role in ensuring the final product looks its best. By following these best practices, you can optimize your images for different platforms, protect them with metadata and watermarks, and choose the right file format and compression.
Choosing The Right File Format And Compression
- Jpeg (joint photographic experts group): Ideal for photographs and images with complex color profiles. Jpegs use lossy compression, meaning some image quality is sacrificed for smaller file sizes. However, it is important to balance compression settings to maintain image quality.
- PNG (portable network graphics): Suitable for images with transparency or simple graphics. PNG files offer lossless compression, which retains image quality but results in larger file sizes compared to jpegs.
- GIF (graphics interchange format): Most commonly used for animated images. GIF files support transparency and a limited color palette, making them ideal for simple animations or graphics.
Resizing And Cropping For Different Platforms
- Consider the platform where your edited images will be displayed. Each platform has its own optimal size and aspect ratio. Here are some general guidelines to follow:
- Social media platforms: Research and adhere to the recommended image sizes for each platform (e.g., Facebook, Instagram, Twitter). This ensures your images display correctly and avoids any cropping or distortion.
- Websites and blogs: Resize images based on the layout of your website or blog. Consider the width of your content area, and aim for a file size that balances image quality and loading time.
- Print media: When exporting images for print, use higher resolutions (usually 300 dpi) and the appropriate color profiles (such as CMYK) to ensure accurate reproduction.
- Cropping can also be necessary to remove unwanted elements, adjust composition, or fit specific aspect ratios. Be mindful of the image’s subject and any important details that might be affected.
Adding Metadata And Watermarks For Protection
- Metadata: Include metadata to provide information about your edited images, such as copyright details, descriptions, and keywords. This helps with organization, copyright protection, and search engine optimization (SEO). Use image editing software or metadata editing tools to add relevant information.
- Watermarks: Consider adding a watermark to your edited images, especially if you plan to share them online. Watermarks can deter unauthorized use or provide brand recognition. Ensure the placement and opacity of the watermark do not detract from the image’s overall quality or visibility.
Mastering the art of exporting and saving edited images is crucial for showcasing your work effectively. By choosing the right file format and compression, resizing and cropping strategically, and adding metadata and watermarks, you can present your images in the best possible way across various platforms while safeguarding your intellectual property.
Keeping Up With The Latest Trends And Updates In Post Production Image Editing
Post production image editing is an essential part of the photography process that can greatly enhance the quality and impact of your images. With the constant advancements in technology and software, it is crucial for photographers to stay updated with the latest trends and updates in post-production image editing.
In this section, we will explore some effective ways to keep up with the ever-evolving world of post-production image editing.
Exploring New Tools And Techniques:
- Continuous learning: Dedicate time to research and explore new tools and techniques that can enhance your post-production workflow. Stay updated with the latest software updates and features.
- Online tutorials and resources: Online platforms such as YouTube and photography blogs offer a wealth of tutorials and resources on new tools and techniques. Subscribe to photography channels and blogs to receive regular updates.
- Trial and experimentation: Don’t be afraid to try new tools and techniques in your editing process. Experiment with different software, plugins, and presets to discover new possibilities for your images.
Following Influential Image Editors And Communities:
- Social media: Follow influential image editors, photographers, and communities on platforms like Instagram and Facebook. They often share their editing techniques, tips, and insights, providing a great learning opportunity.
- Online forums and communities: Join online photography forums and communities where photographers discuss and share their experiences with image editing. Participate in discussions, ask questions, and contribute to the community.
- Industry publications and blogs: Stay updated with industry publications and blogs that focus on post-production image editing. They provide valuable insights, tips, and trends related to the field.
Attending Workshops And Training Programs:
- In-person workshops: Attend workshops and training programs conducted by experienced professionals in the field. These workshops offer hands-on experience, allowing you to learn new techniques and gain valuable insights.
- Online courses: Enroll in online courses or training programs that focus on post-production image editing. Many platforms offer comprehensive courses taught by experts, allowing you to learn at your own pace.
- Local photography groups: Join local photography groups or clubs that organize seminars or workshops on post-production image editing. These provide a chance to connect with fellow photographers and learn from their experiences.
By keeping up with the latest trends and updates in post-production image editing, you can enhance your skills and take your photography to the next level. Remember, continuous learning and experimentation are key in staying ahead in this dynamic field.
Frequently Asked Questions On Post Production Image Editing
What Is Post Production Image Editing?
Post production image editing refers to the process of enhancing, retouching, and manipulating images after they have been captured. It involves adjusting colors, fixing imperfections, adding or removing elements, and refining the overall appearance of the image using software like Photoshop.
Why Is Post Production Image Editing Important?
Post production image editing is important because it allows photographers and designers to bring out the best in their images. It helps to correct any flaws or imperfections, enhance the colors and tones, and create a polished and professional look.
It also allows for creative freedom to manipulate the image to achieve the desired result.
What Software Is Used For Post Production Image Editing?
There are many software options available for post production image editing, but some popular ones include adobe photoshop, lightroom, and gimp. These programs offer a wide range of tools and features to effectively edit and enhance images, providing photographers and designers with the necessary tools to achieve their desired outcome.
How Long Does Post Production Image Editing Take?
The time required for post production image editing can vary depending on the complexity of the edits and the number of images being edited. Simple edits may only take a few minutes per image, while more complex edits or large batches of images can take hours or even days.
It also depends on the skill and experience of the editor.
Can I Learn Post Production Image Editing On My Own?
Yes, it is possible to learn post production image editing on your own. There are numerous online tutorials, courses, and resources available that can help you gain the necessary skills and knowledge. Practice and experimentation are key to mastering this craft, so don’t be afraid to get hands-on and learn from your own experiences.
Should I Outsource My Post Production Image Editing?
The decision to outsource post production image editing depends on your specific needs and priorities. Outsourcing can save you time and effort, allowing you to focus on other aspects of your work. It can also provide access to professional expertise and ensure consistent quality.
However, if you prefer to have full control and enjoy the process of editing, doing it in-house may be a better option for you.
Conclusion
Post-production image editing plays a crucial role in enhancing the quality and appeal of photographs. By making use of various editing techniques and tools, photographers and graphic designers can transform a raw image into a visually stunning masterpiece. From adjusting brightness and contrast to enhancing colors and removing blemishes, post-production editing allows for the creation of images that are more vibrant, polished, and professional.
Moreover, it enables individuals to express their creativity and artistic vision by adding filters, overlays, and special effects. Additionally, post-production editing helps to optimize images for various platforms and devices, ensuring that they are visually captivating and engaging to the target audience.
Ultimately, by employing effective post-production image editing techniques, photographers and graphic designers can elevate their work to a whole new level, making a lasting impression and capturing the attention of viewers. So, don’t underestimate the power of post-production editing in delivering visually striking and impactful images.